What I learned about shooting ice cream
When I was asked to shoot for a local ice cream company I couldn’t wait to get started. I’d shot ice cream before but this time I was flying solo due to covid-19. That meant no food stylist, no art direction on set and just me (and my other half) left to eat it all at after! I had to buy an extra freezer just to house all the tubs but oh what a glorious sight - I’d never seen a more delicious looking freezer.
Ice cream is unforgiving, it’s unpredictable (apart from knowing it will melt to a puddle in no time) and it can be very difficult to work with. I had quite a few recipes to get through with this shoot so I knew I needed to be prepared.
The drips took no time to appear
I had already thought about pre scooping the ice cream and figured it would be a good idea. I’d watched a few styling tutorials before and it made sense to have a selection of scoops already frozen and ready to go on set. I’d read before about dry ice being a thing for styling ice cream so I looked into it. It can be bought in Northern Ireland in pellets or slabs but I didn’t have the room to house the 10kg minimum order (all my freezer storage was going to be occupied by litres of ice cream of course). So instead I bought a few extra baking sheets with the idea to freeze them to set the scoops on. I bought a glass Pyrex baking tray and an anodised baking tray. The glass one worked a treat, the anodised tray not so much. It froze well but as soon as the ice cream hit it it began to melt fairly quickly. The Pyrex glass held it’s temperature much better and froze the base of the scoops instantly.
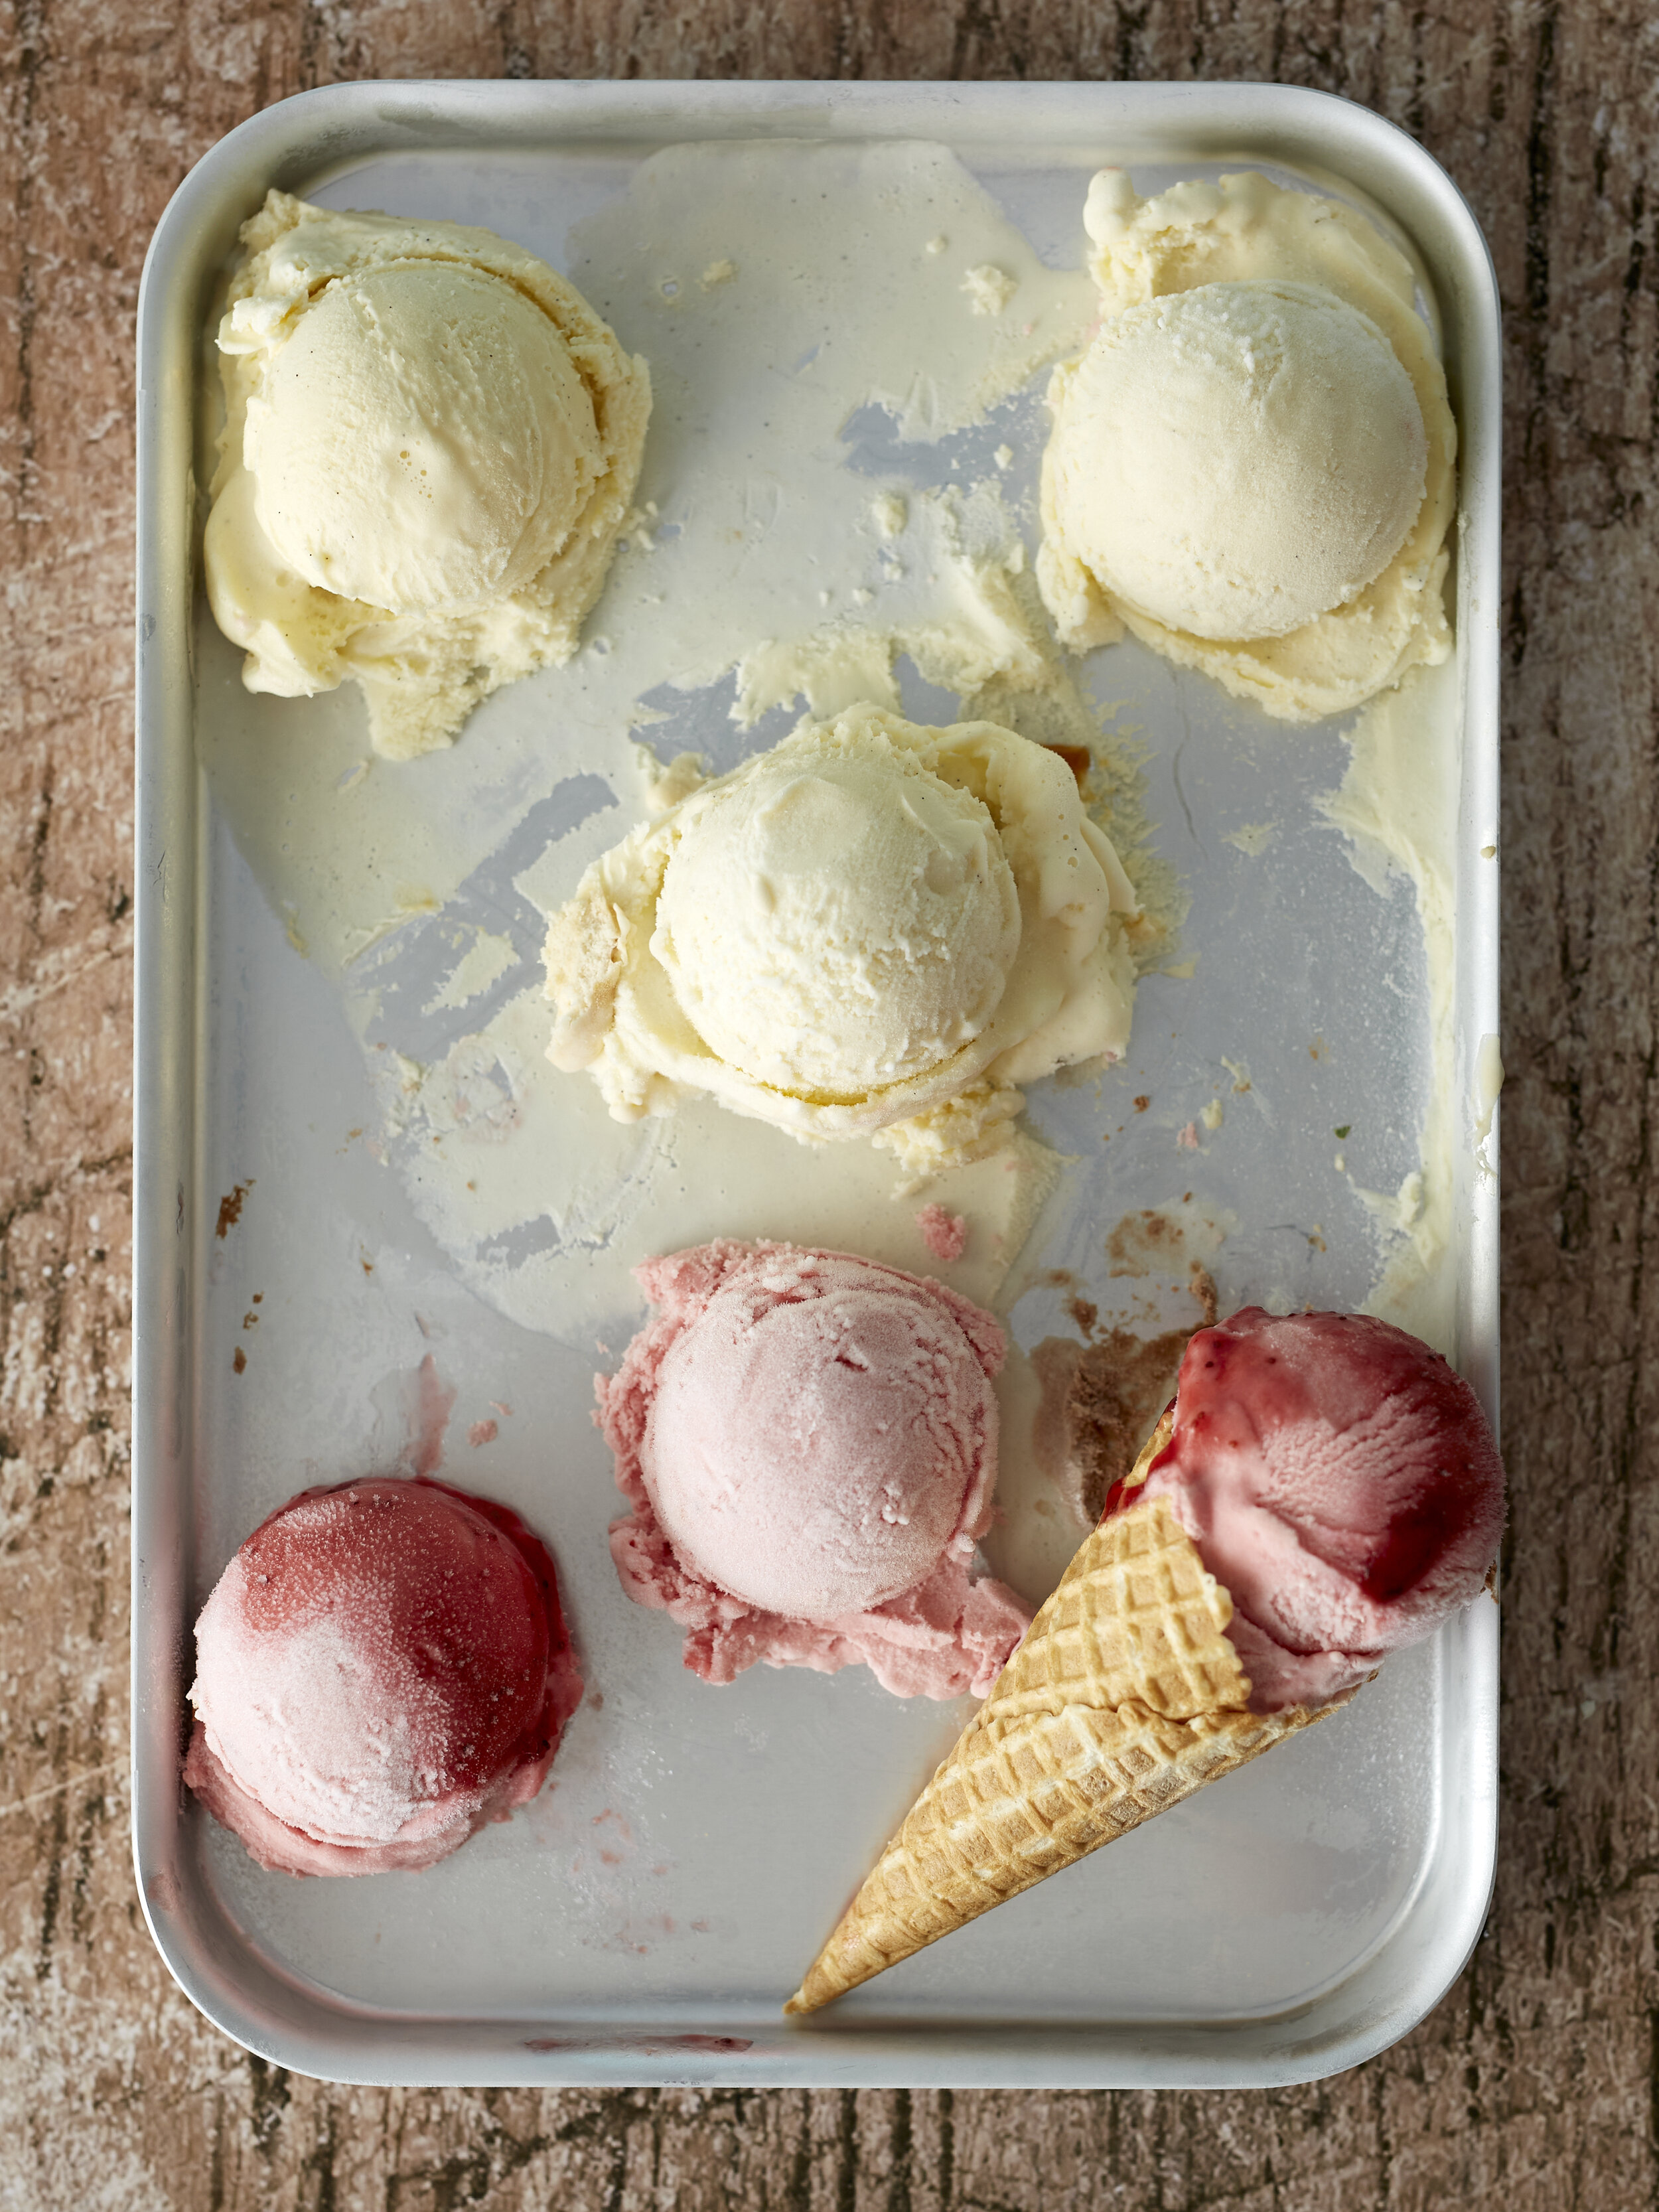
Pre scoops ready to be used
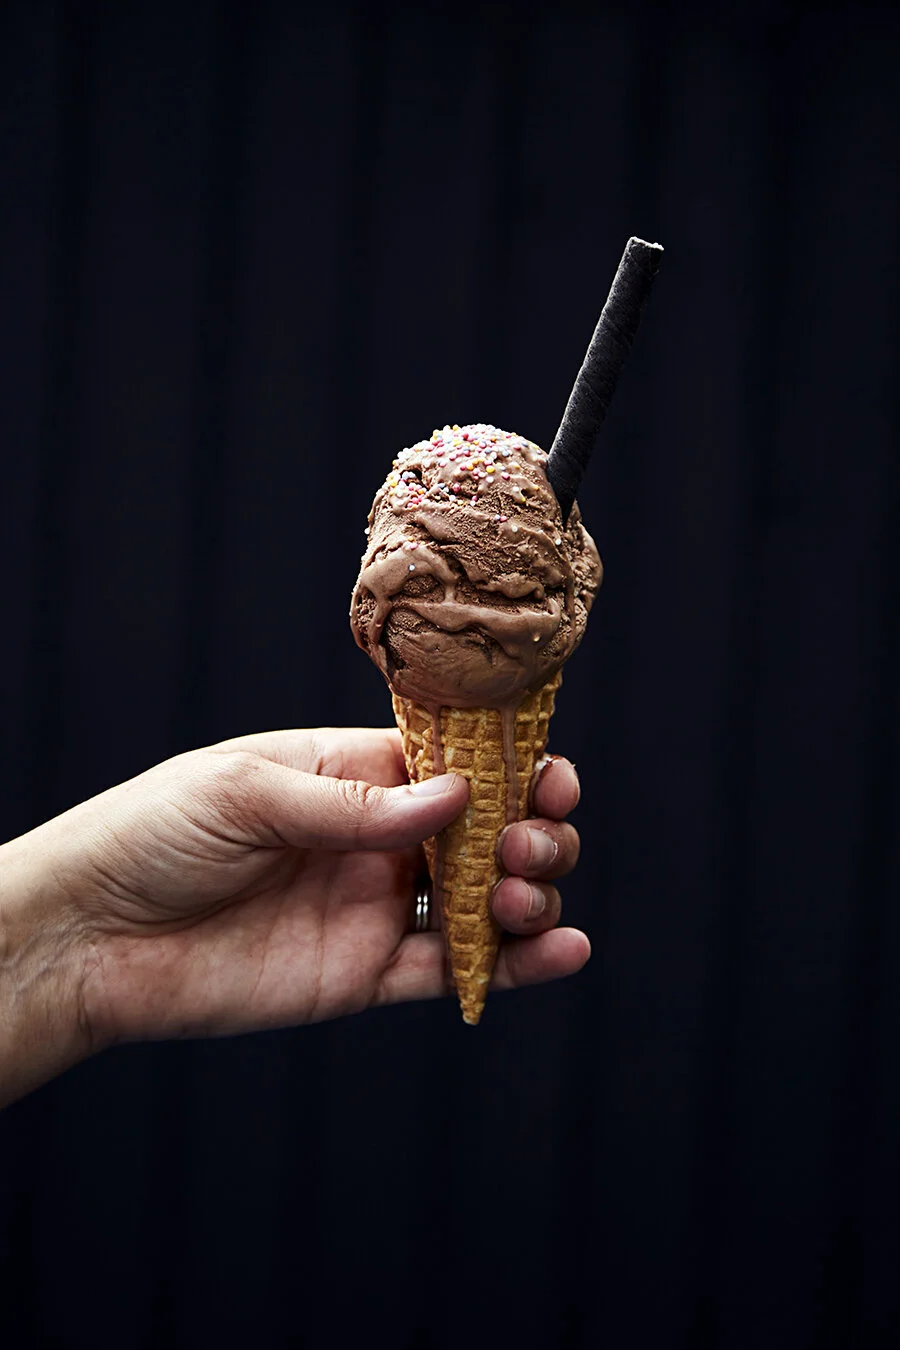
Now it was down the utensils and the scoop. Any I had already were primarily for aesthetic purposes but now I needed a scoop that actually did a good job at scooping! I wanted beautifully round scoops with a perfect skirt (I also learned that’s what you call the ruffle of ice cream below). I settled on an OXO Good Grips ice cream scoop with a mechanism to release the scoop which came in extremely handy. Now I was all set.
This isn’t the OXO scoop but one I use a lot for aesthetic purposes
Knowing exactly what you are going to shoot and how you are going to shoot is vital with most food photography jobs but even more so when it comes to shooting ice cream. Ideally you want to build your scene with a stand in for the ice cream and have lighting, props and camera settings fixed before bringing out the real thing. There’s not much time for rearrangement once the ice cream hits room temperature!

Ice cream has a perfect scooping temperature, about -17 degrees Celsius or 0 degrees fahrenheit. My freezer was below this temp, I had to keep it more like a deep freeze as I was placing the scoops back in to re freeze them. Not ideal but I had to work with it - I let the tub sit out for about 5 minutes or so to soften very very slightly. With a bowl of boiling water to hand and a drying cloth, I heated my scoop before digging out the ice cream. After each scoop I dunked it into the water again and dried it off, this gave me a nice clean scoop each time. I set the tray full of scoops back into the freezer for about 2 hours or overnight while I planned everything else.
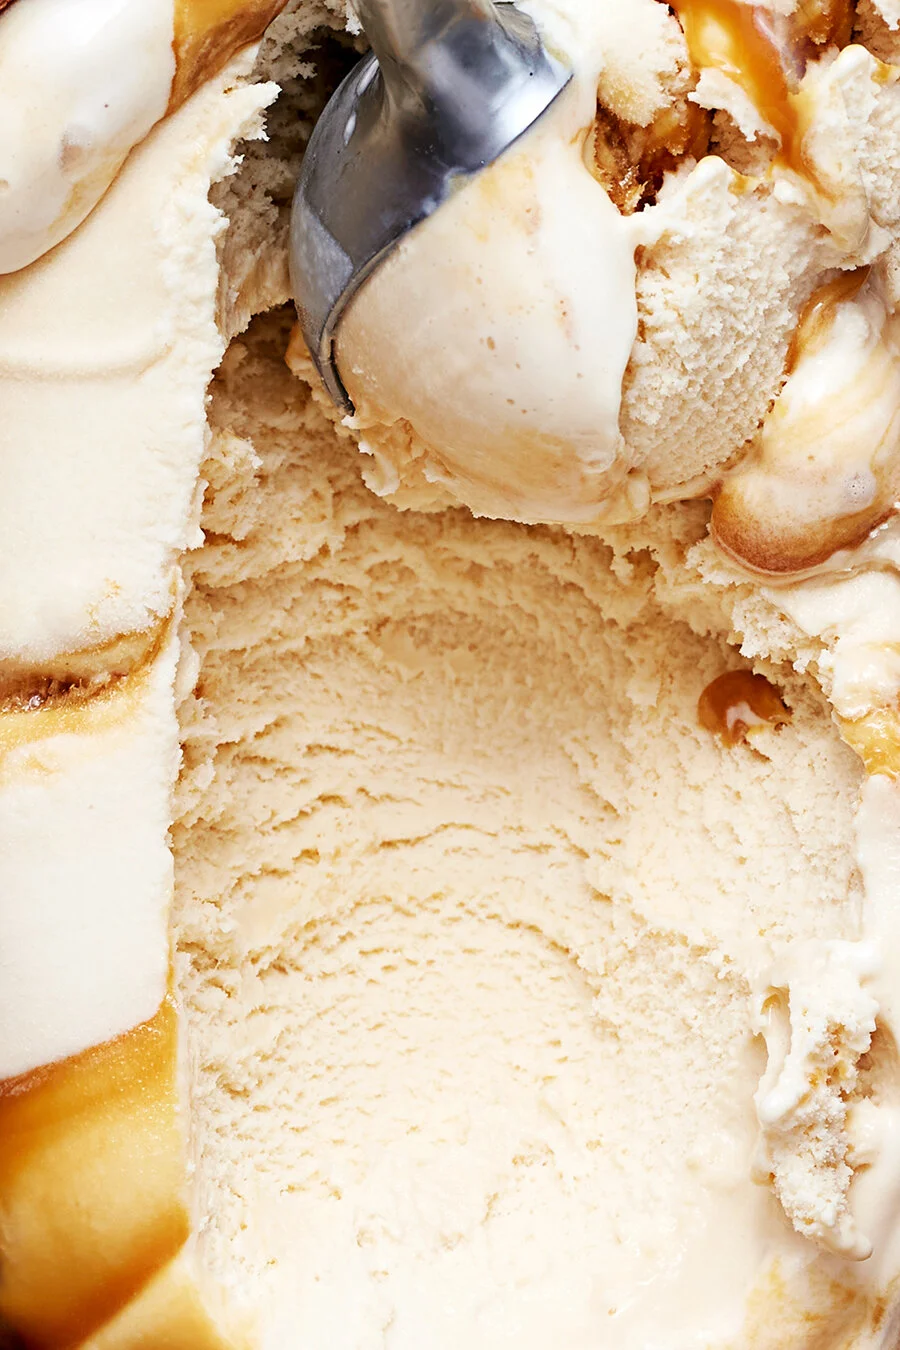
Chocolate ice cream bowl
For this shot I had multiple scoops ready to be layered into the bowl. I built up each one taking shots in between to make sure I was getting the angle right. The one downside about freezing scoops (especially darker ice cream like chocolate) is that when you bring it on set there is a layer of ice that forms over the scoop. It makes the scoop look very frozen - too frozen and not soft enough that you would want to eat it. The key to a good shot is that the ice cream looks ready to be eaten, you imagine digging in with your spoon and the texture being just right. I glanced over to my prop shelf, I saw a cooks blow torch and thought yeah that might work… So I gave the scoops a little blast of hot flame - it worked a treat! The ice cream melted very slightly, enough to give a nice specular highlight and the look I was hoping for.

Before blow torch

After blow torch
Ice cream sundae
The whole fake ice cream and mashed potato thing is a method used by many photographers. Ive worked with fake ice cream before and it looked amazing, just like the real thing with all the time in the world to poke and prod it. That wasn’t an option here as it was the product itself we were showcasing and it had to be the real thing. For this sundae however I did fill the glass with Smash as I knew you wouldn’t see it through the glass anyway. I drizzled some chocolate sauce inside the sundae dish and swirled it around, popped in the Smash, filled in any gaps with more sauce and then began to assemble with a pre frozen scoop of vanilla that matched the colour of the Smash perfectly. This wouldn’t be an option all of the time, and one I’d prefer to not use as the potato close up does not resemble the exact same texture as ice cream. Only because I knew it would be hidden in the glass I used it - otherwise no way.

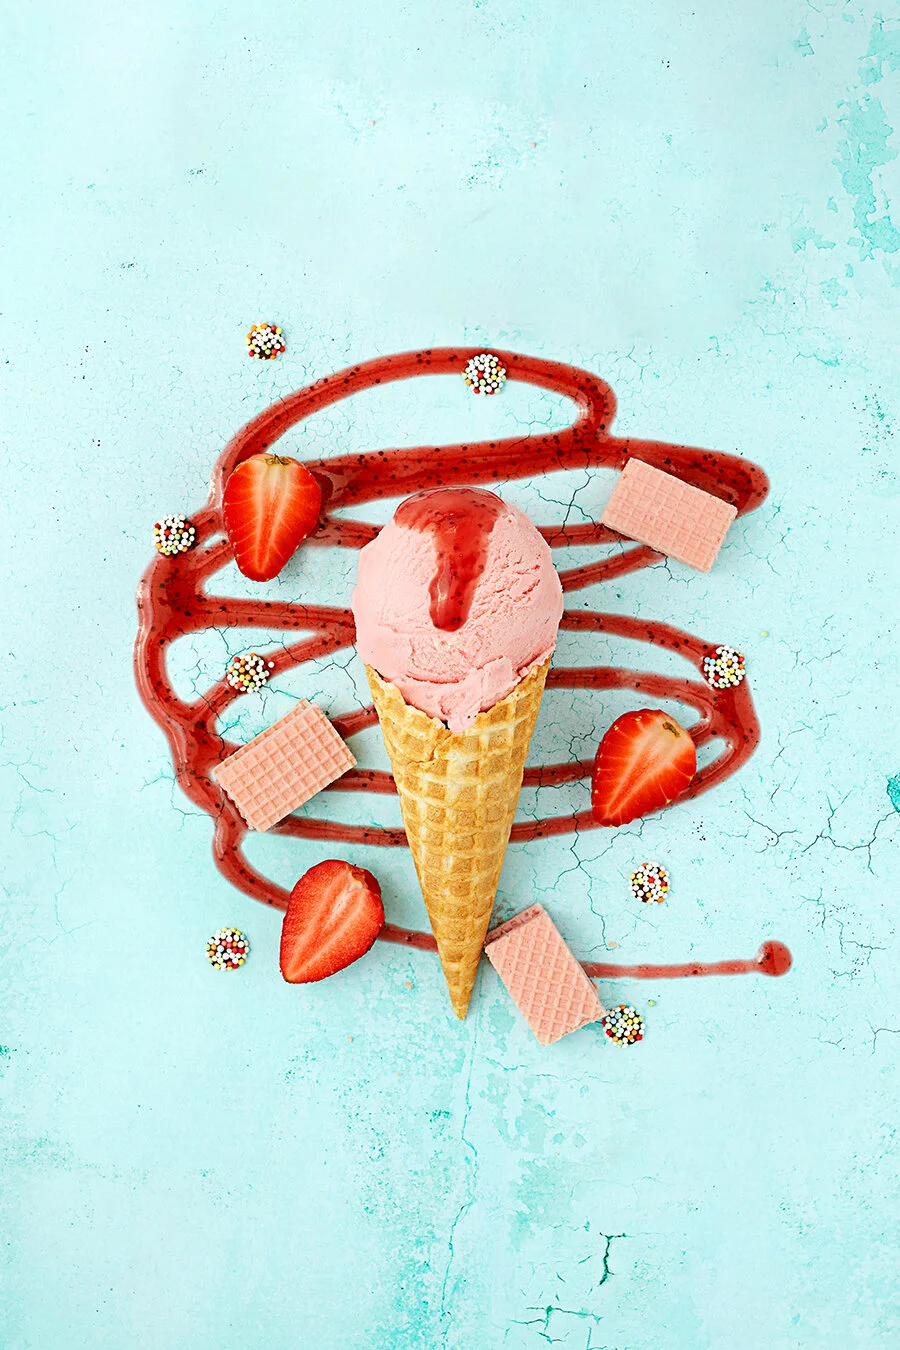
Waffle cone
This was a perfect scoop - it came out a great shape and fitted the cone perfectly. I wanted to shoot this scene as it was and not a composite so I had to lay the cone flat onto the actual ingredients. This posed a problem as when I lay the cone flat the ice cream fell out! Here’s what I did - I grabbed a strawberry that fitted tight into the bottom of the cone - this worked perfectly as its a similar shape and was firm enough for me to stick cocktail sticks into. I used three cocktail sticks and fixed them into place so the scoop of ice cream could be skewered on top and be locked into position. When I lay the cone flat now, everything stayed where it was meant to be. I poured the sauce onto the cone upright before laying it down again to give the sauce a chance to drip down the ice cream as it would naturally.
There you have it kids, my take on shooting ice cream. I feel a lot more comfortable with it now and with more experimentation I’m sure we’ll be best friends in the studio as well as the kitchen.
Take care and happy shooting!
Sharon